Pull Requests and QA
Summary
Just need a quick reminder? This flowchart shows a summary of the process. Scroll down to see more detail about the steps.
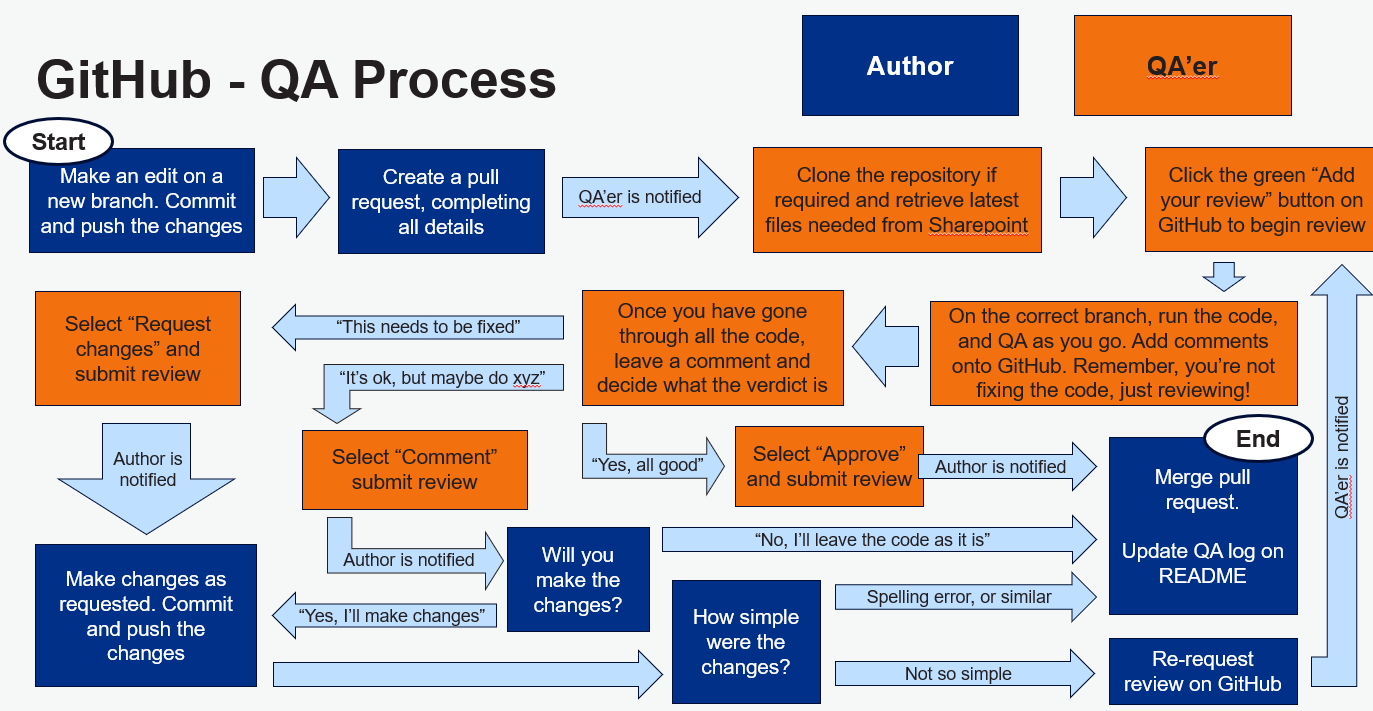
This process can be managed in GitHub desktop, VS Code, RStudio, or the IDE you are most comfortable with.
Remember the principles of branching
First let’s remind ourselves of the principles of branching (see here for an intro to branching):
All code in the main branch should be fully QA’d and functional - even if this means that the repo is almost empty initially.
New developments and changes should be coded in their own branch: one branch per ‘feature’. Give the branch a name that helps you identify what a change relates to.
If working on larger changes, it may be best to break it down into smaller steps and develop and QA iteratively - you can branch off your branch to help with this.
GitHub will provide an audit trail of changes made, when they were made, and who made them. This aligns nicely with the team’s QASAR process. It is also easy to roll back to an earlier version if needed.
Remember that we don’t have enterprise licences so we can’t protect our main branches. Changes can be merged without review so be careful.
1. Planned QA Process
Check
There are a couple of checks to do before QA kicks off properly.
If you are the author:
Check that your code is intentionally commented.
The changes you have made are complete, self-reviewed, and saved.
You may want to include the author and latest modification date at the top (although GitHub will help manage this for you).
Ensure that you have committed and pushed the latest changes so that the person QA-ing has the most recent version.
Make sure that the reviewer is a collaborator in the repo settings.
Ensure any files (e.g. config) required for the code are uploaded onto SharePoint for the reviewer to use.
If you are the reviewer:
- Make sure that you have the time, access, and knowledge to do the review.
Creating a Pull Request (how the author requests QA)
Given that all your changes are in a new feature branch, the QA process boils down to pull requests.
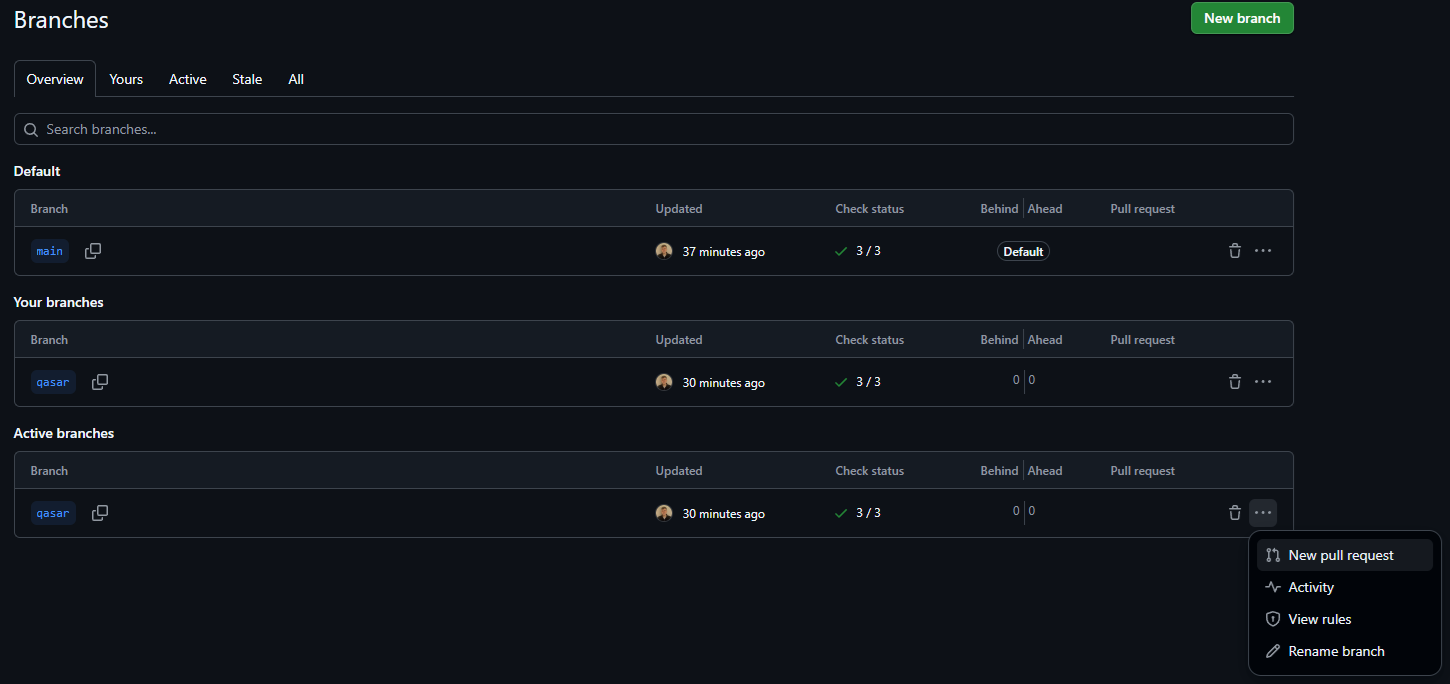
On your repository, navigate to the branches list
Click on the 3 dots for the branch you want to be QA’d and click New pull request
Add a description of what needs to be QA’d, why changes have been made, location of any required files (links to public data, or files on SharePoint path from Analysis/ onwards only!) in order to run the code, and any specific QA requests
Add a reviewer (the person you want to QA) and
Add an assignee (usually you, the person responsible for merging the branch once QA has passed)
Click create pull request
Here’s an example of a filled in pull request.
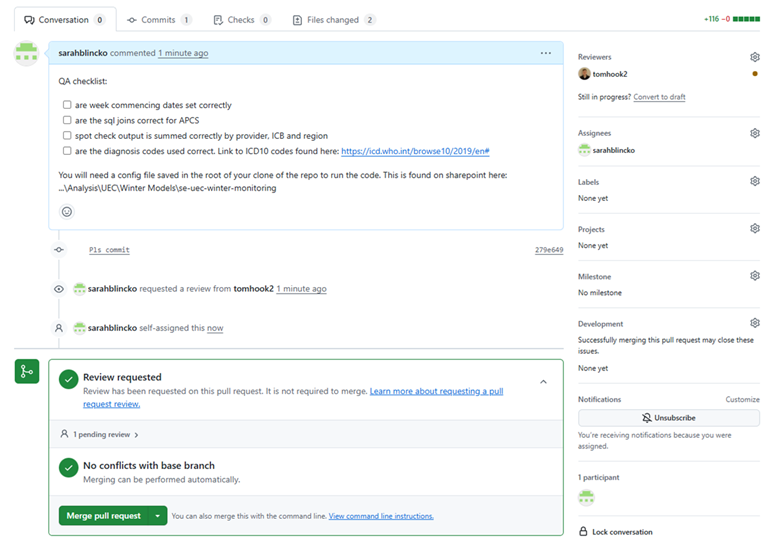
This is the notation to create a checklist:
- [] Item 1
- [] Item 2
Complete QA - the reviewer
Once you’ve been added as a reviewer, you will receive an email with a link, and a GitHub notification where you can view changes.

Additions will be in green and removals in red
Review the QA checklist and files changed list. Add comments and request changes where necessary. The best way to do this is often to clone the repository to your local area, and run the code yourself.
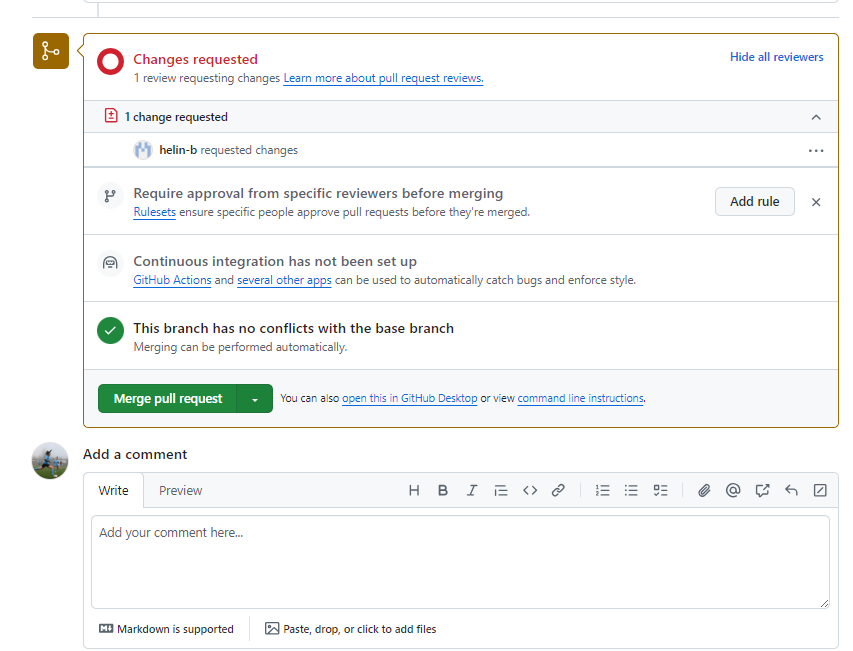
Once on the Pull Request page, navigate to the Files changed tab to see the code.
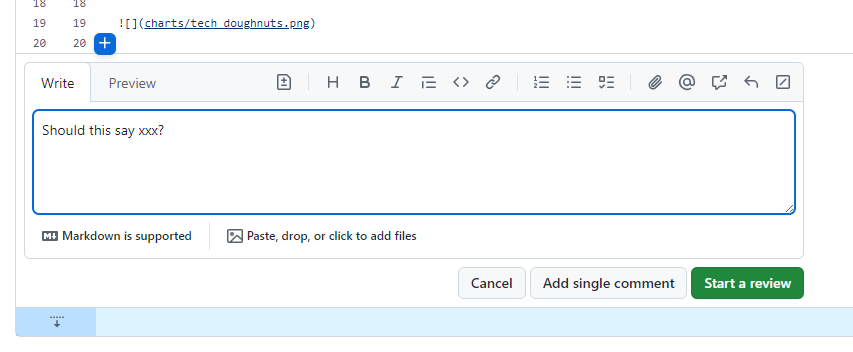
Comments can be added in-line with code. If you do this, click Start a Review if you want all the comments to be sent over at once, at the end of your review.
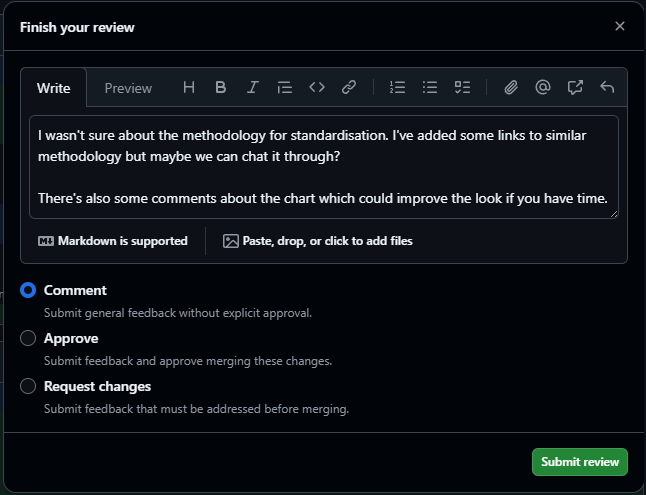
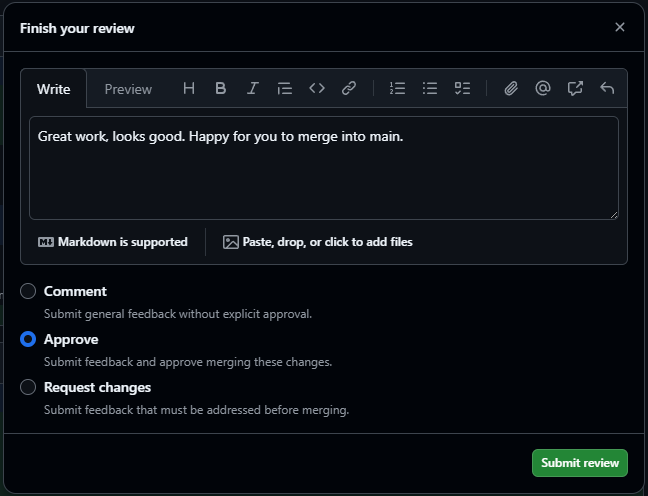
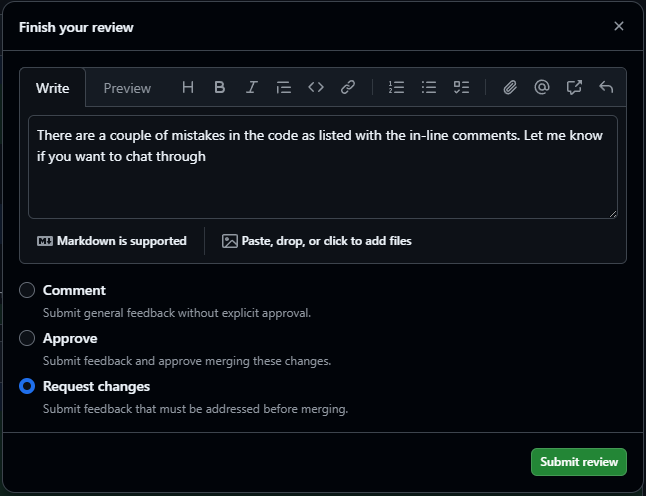
After reviewing the code, as reviewer, you decide what the verdict is. Click “Review Changes” and leave an overall comment, with one of the following options:
- Comment - Submit general feedback without explicit approval
- Approve - Submit feedback and approve merging these changes
- Request changes - Submit feedback that must be addressed before merging
If as the reviewer, you think there could be some improvements, or you’re not sure about xyz, this is a good way to convey that.
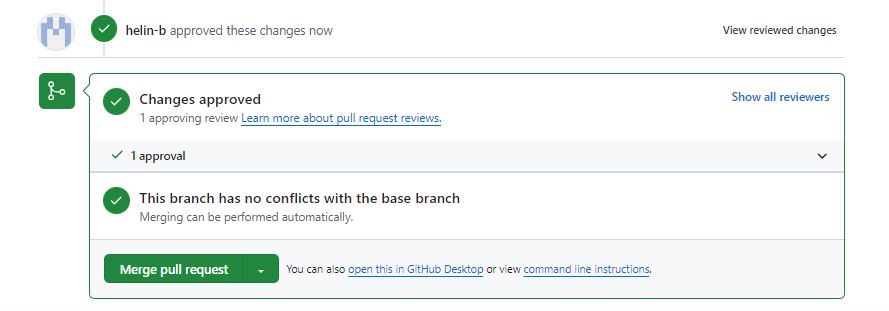
If as the reviewer, you’re happy with the piece of work, and want the author to merge this into main branch with no edits, this is what you want.
If as the reviewer, you’ve spotted something which needs to be changed before being merged into main, you can request changes to deny the pull request until those are actioned.
Merge and tidy - the author
At this stage, the work now sits back with the author.
If the author decides to make changes on the back of the review, these changes should be made on the same branch. The author should decide if another review is required (correcting a spelling error doesn’t require one, but changing methodology may). If so, the author can use re-request review on the same pull request, notifying the reviewer.
After any changes are made, the branch is ready to merge. Once the pull request is merged the author can delete the old branch (or the repo can be set up to automatically delete the old branch). You will still be able to see all the historic commits but it is best to tidy up branches so that only the active ones exist. If you need to change anything, you can simply create a new branch!

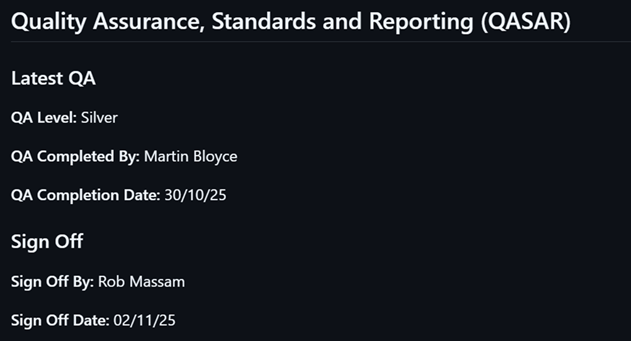
The author should then update the README (directly onto the main branch is fine) with QASAR information including level of QA, who conducted QA, and sign off. This information is included in the se-template and makes QASAR information easy to find. Further detail is available in the repo history.
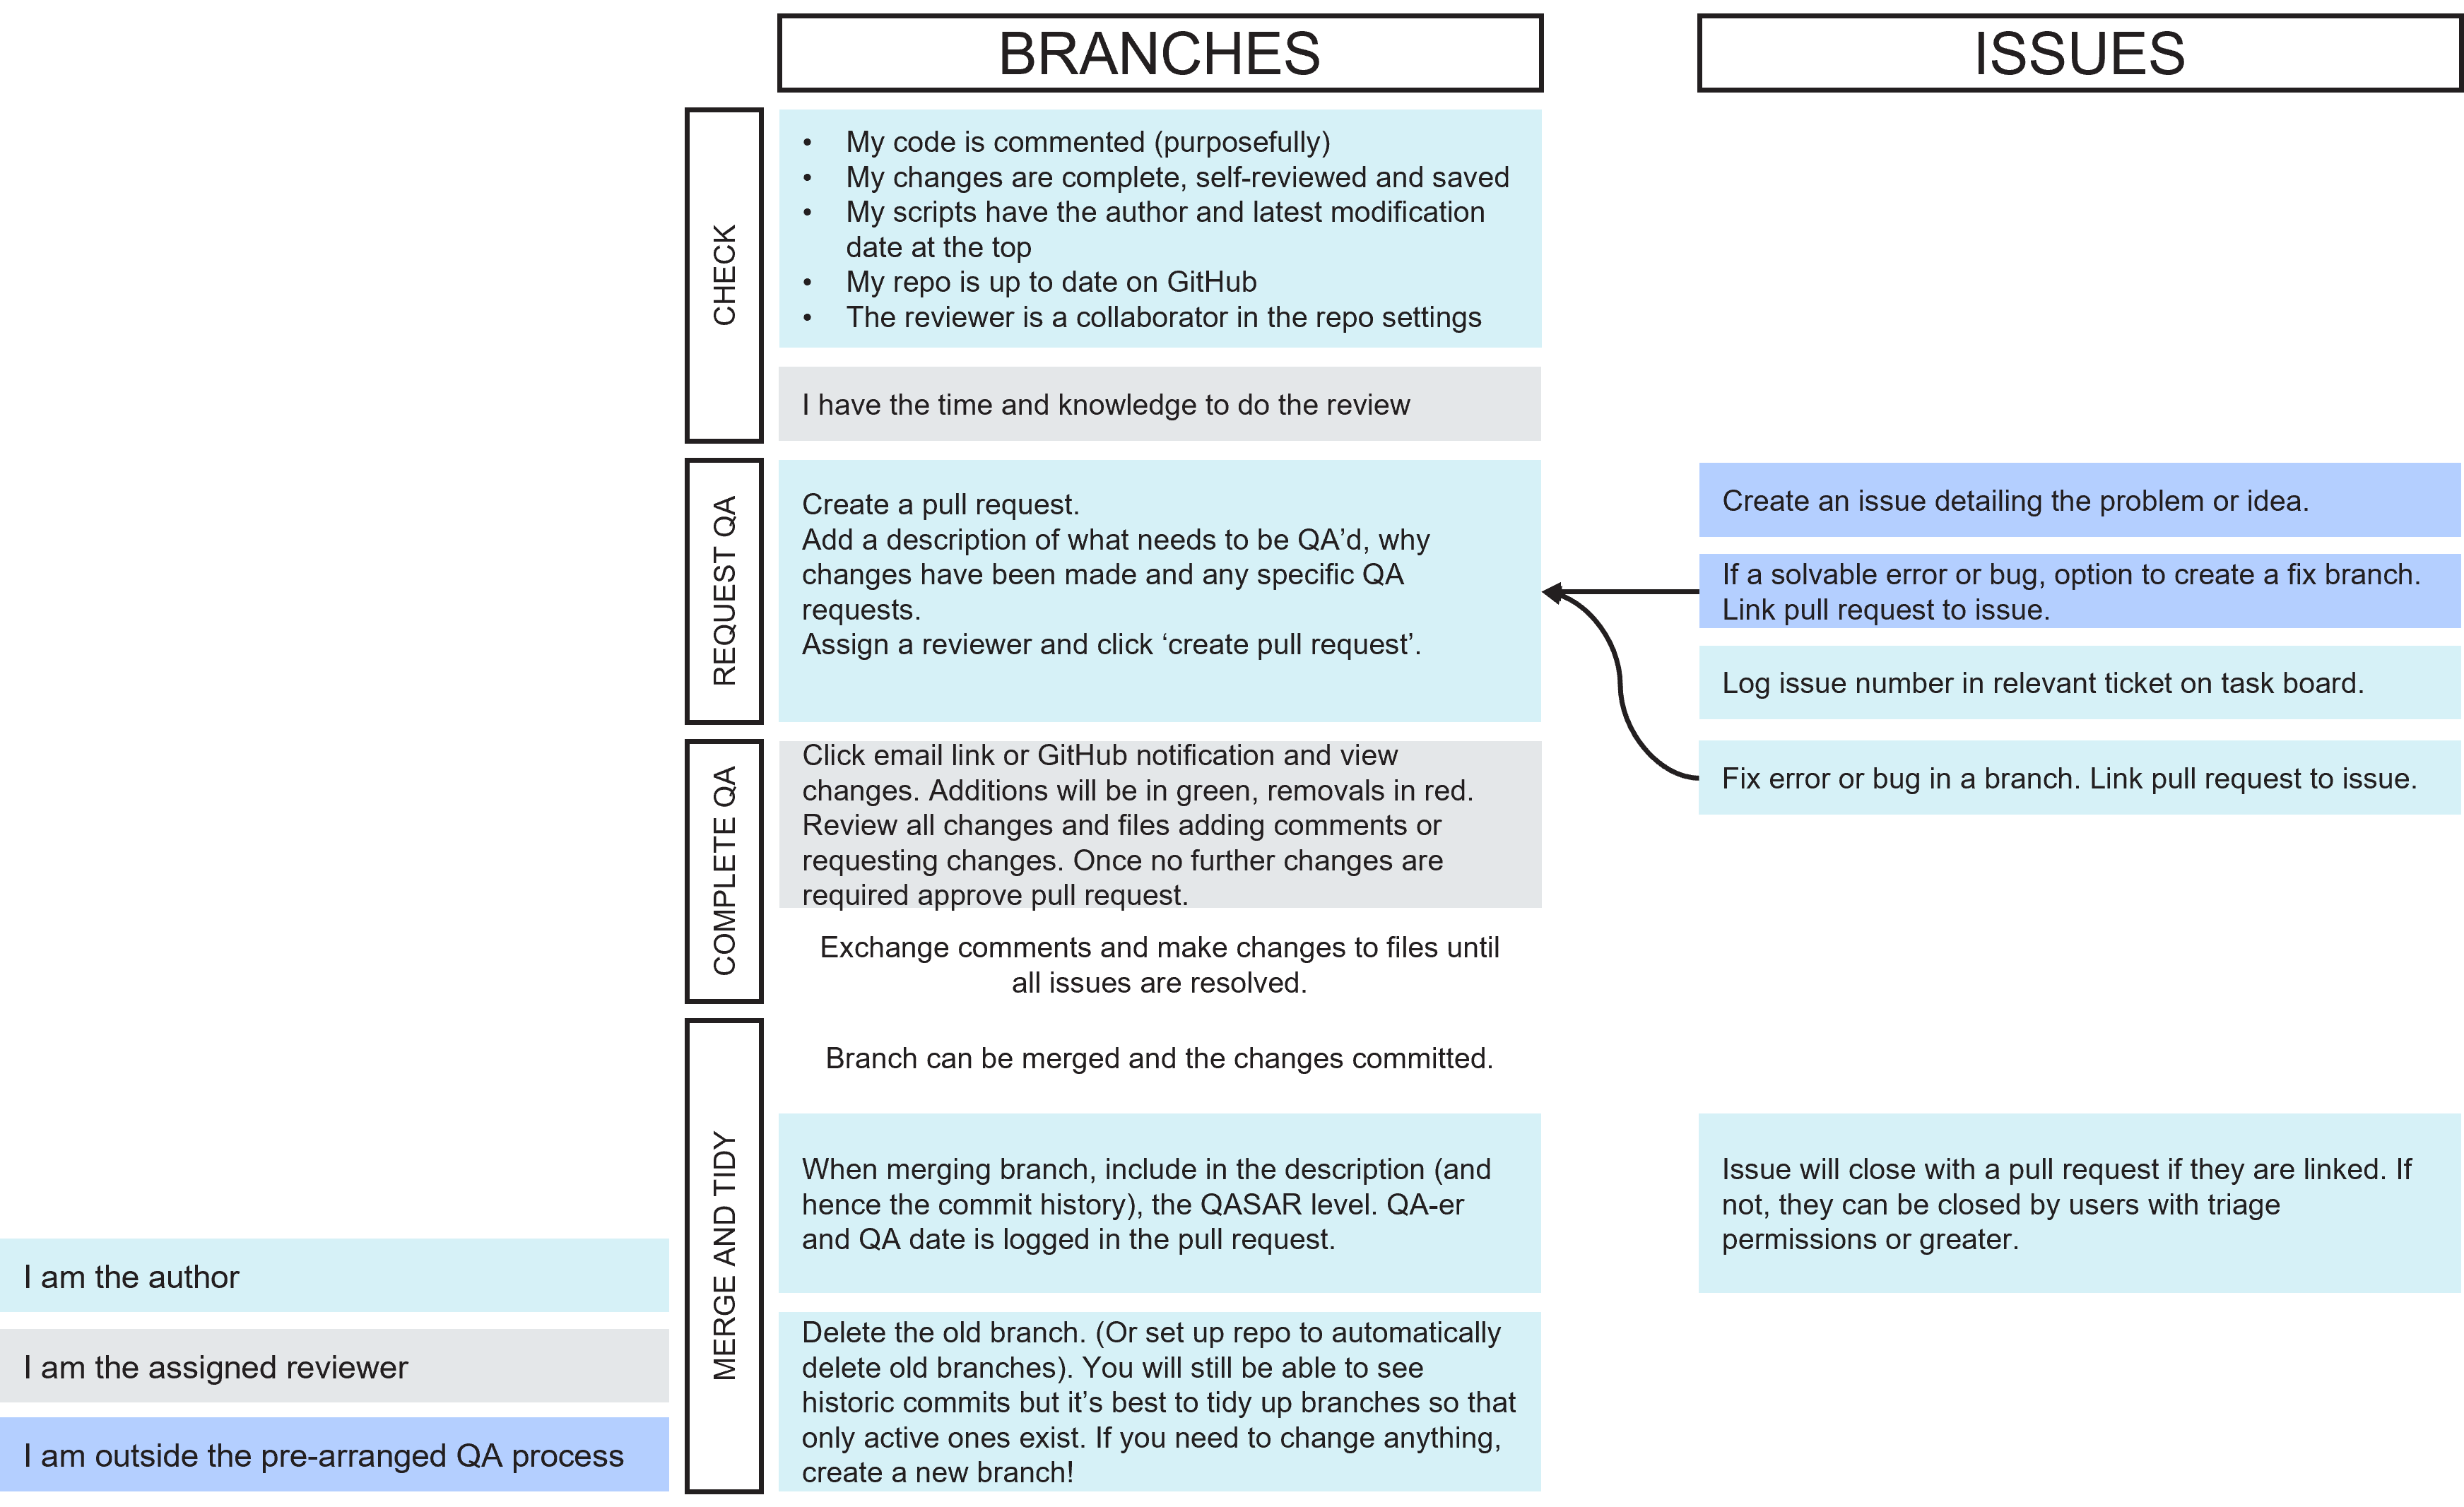
2. What to do if you spot an issue or have an idea
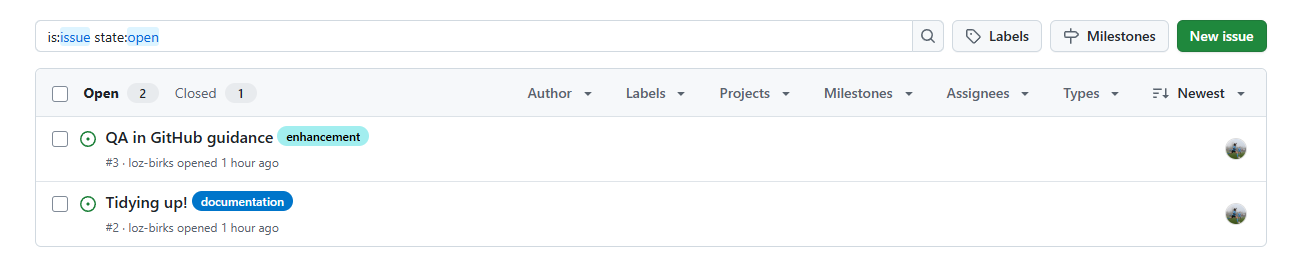
If you are not within the designated QA process, it is still possible that, in using the code, you see a bug or you have a suggestion for a development. You can do that by creating issues. Any user with read access to a repo can create an issue (assuming that issues are enabled for the repo).
The process
[You, the idea-haver or bug-spotter] Create an issue detailing the problem or idea (help here: https://docs.github.com/en/issues/tracking-your-work-with-issues/using-issues/creating-an-issue).
[You] If the error or bug is solvable and you feel inclined, you have the option to create a branch that addresses the issue. You can link the pull request with the issue (https://docs.github.com/en/issues/tracking-your-work-with-issues/using-issues/linking-a-pull-request-to-an-issue#linking-a-pull-request-to-an-issue-using-a-keyword).
[The author] The person managing the code can add the issue number to any relevant ticket on the task board.
[The author] The error, bug, or development can be prioritised and actions. Their pull request can also be linked with the issue (https://docs.github.com/en/issues/tracking-your-work-with-issues/using-issues/linking-a-pull-request-to-an-issue#linking-a-pull-request-to-an-issue-using-a-keyword).
Issues linked with a pull request will close automatically when they are merged. If not, they can be closed by users with triage permission or greater (https://docs.github.com/en/issues/tracking-your-work-with-issues/administering-issues/closing-an-issue).
Summary of the process