Git in R-Studio
Version Control for your R projects
This guide will show you how to create new R-Studio projects with version control features using Git and GitHub, and how to link R-Studio with a GitHub repository.
This will allow you to work entirely from R-Studio, applying version control to your scripts, creating new project on GitHub and doing all standard version control actions: commits, pushes and merges, directly from R-Studio.
Create a New GitHub Repo
For this guide, we are going to create a new GitHub repository. Clicking the New green button on GitHub (top left) presents you with the following options:
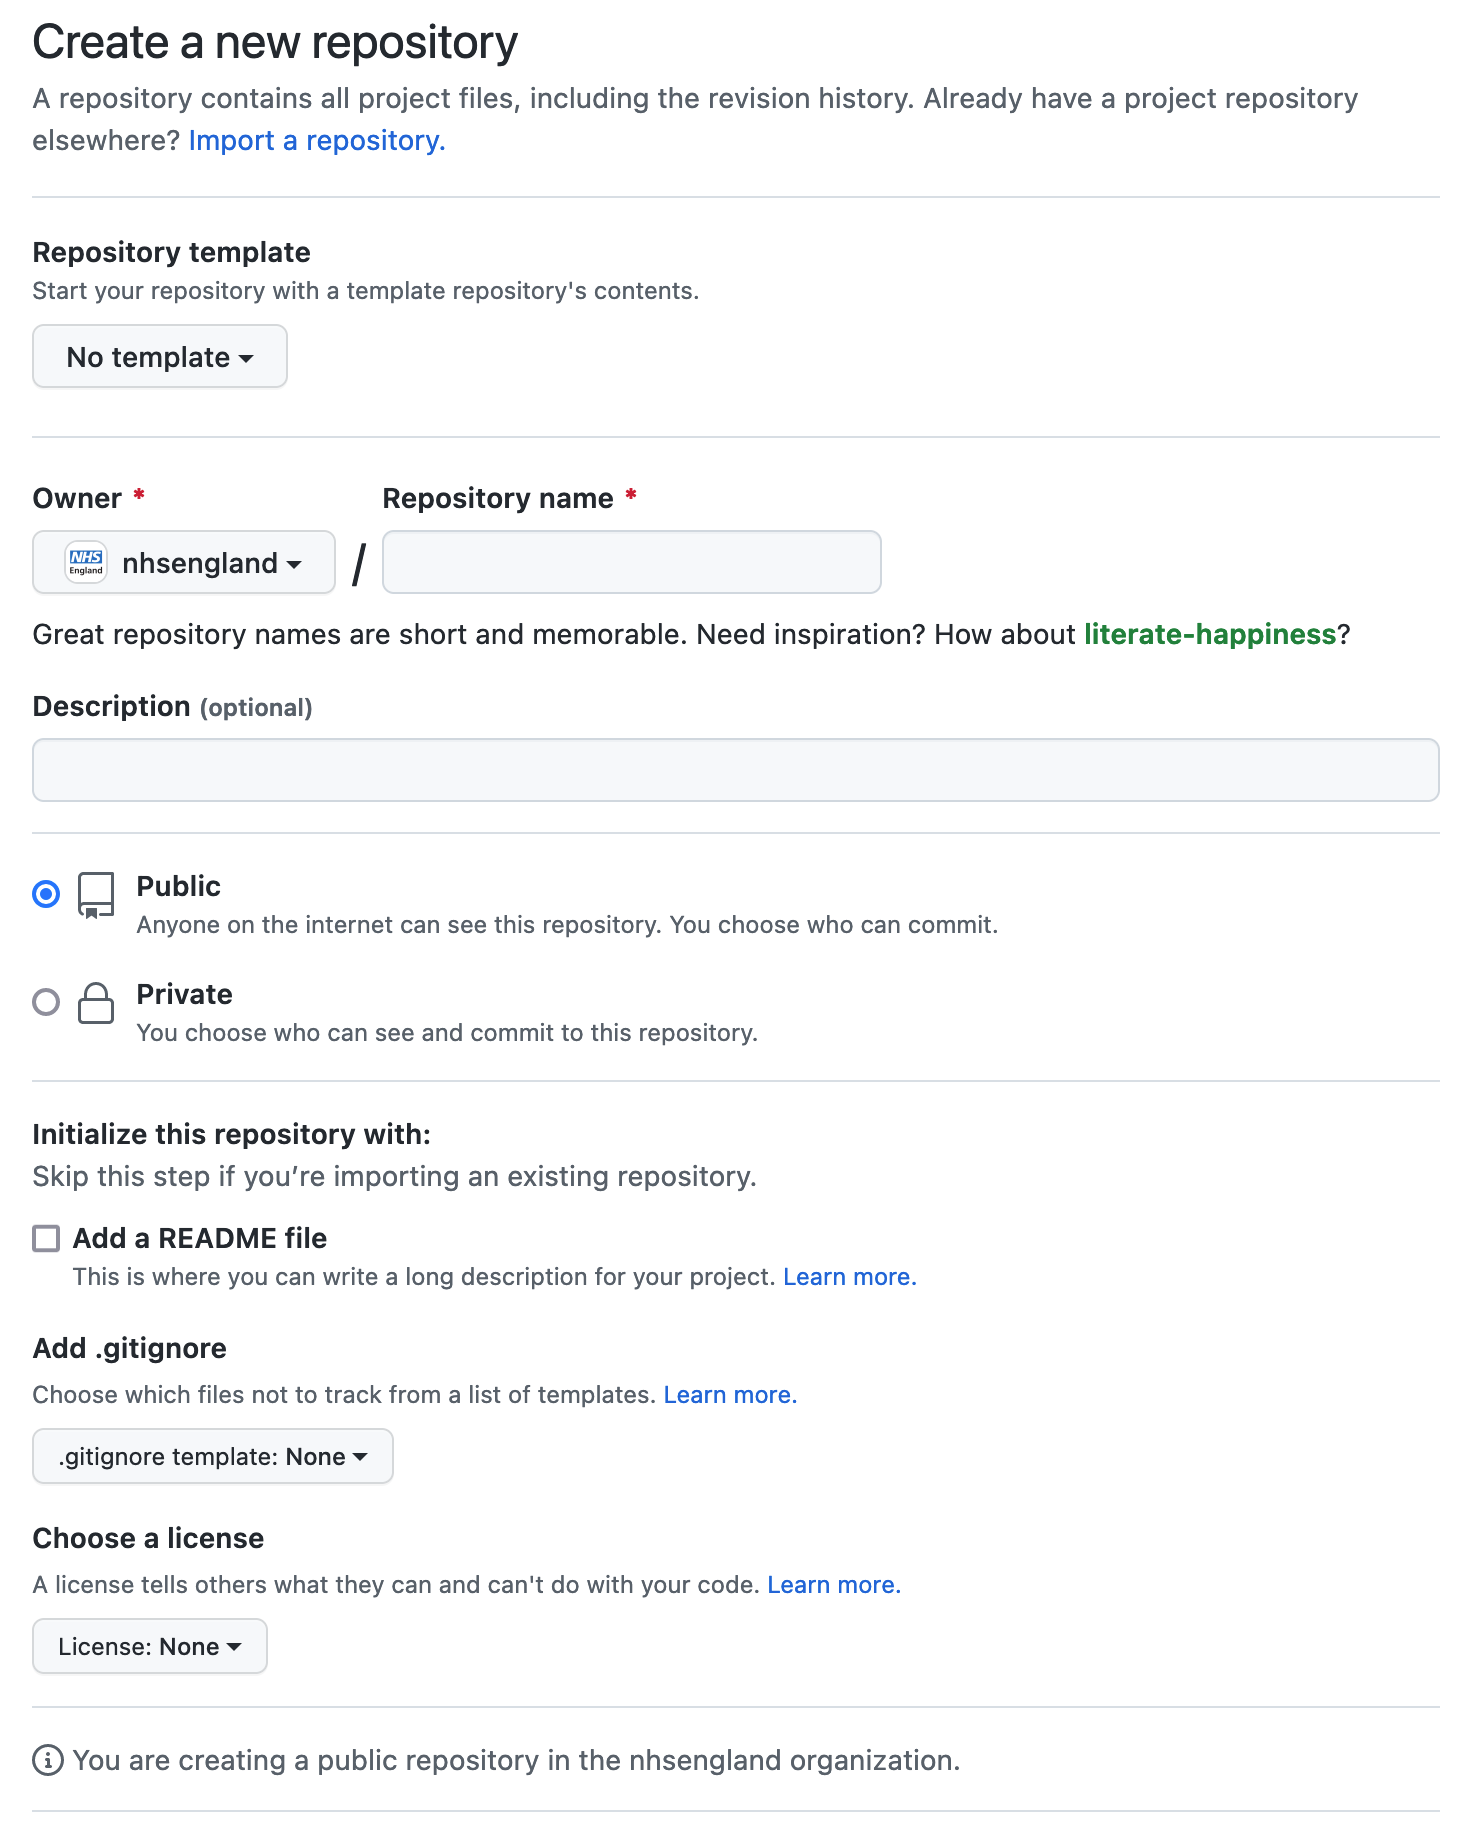
- Do not use a template unless required
- Give your repository a name, typically lower-case with a dash
-separating each word. - Set the visibility to
Public(see note below) - Select, add a
READMEfile - Add a
.gitignoretemplate forR - Give it the MIT License
- Click the
Create Repositorybutton
While we encourage the sharing of code in PUBLIC repositories, please take note of NHS England’s policies on open-source work relating the official NHSE projects:
Following the steps above, I created a new public repo: https://github.com/Pablo-source/climate_viz
Clone Repository into R-Studio
In this section we are going to clone our GitHub project into a new project we will create in R-Studio.
- From GitHub, select the
<> Codebutton on the repo page to display the different cloning options for this project. - Choose
HTTPSand click on the copy icon (overlapped squares) on the right side of the URL.
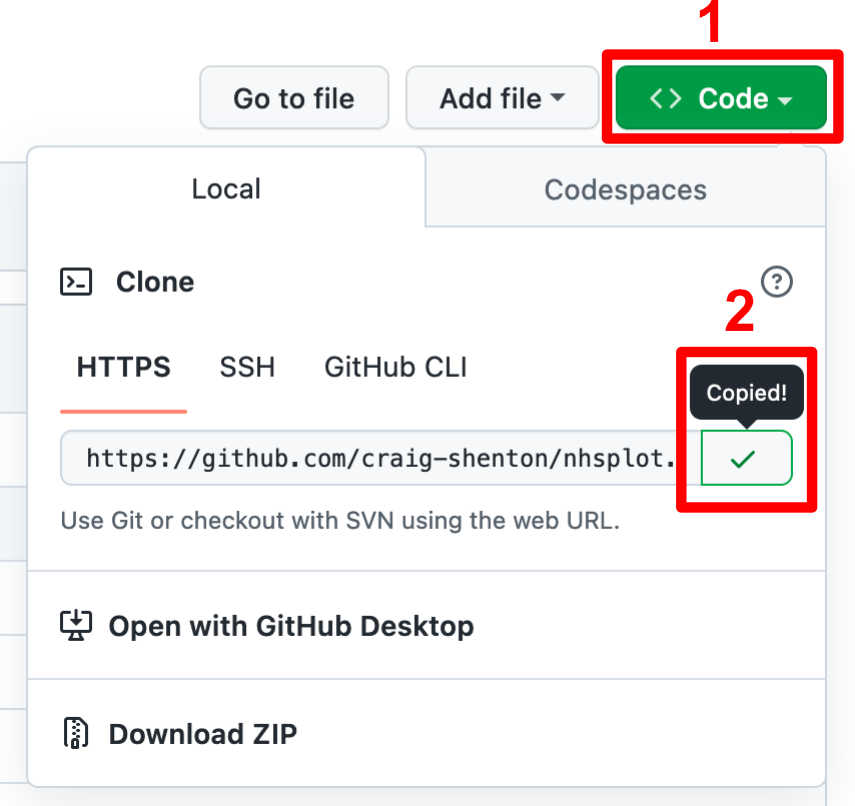
This is the URL I just copied from the example repo:
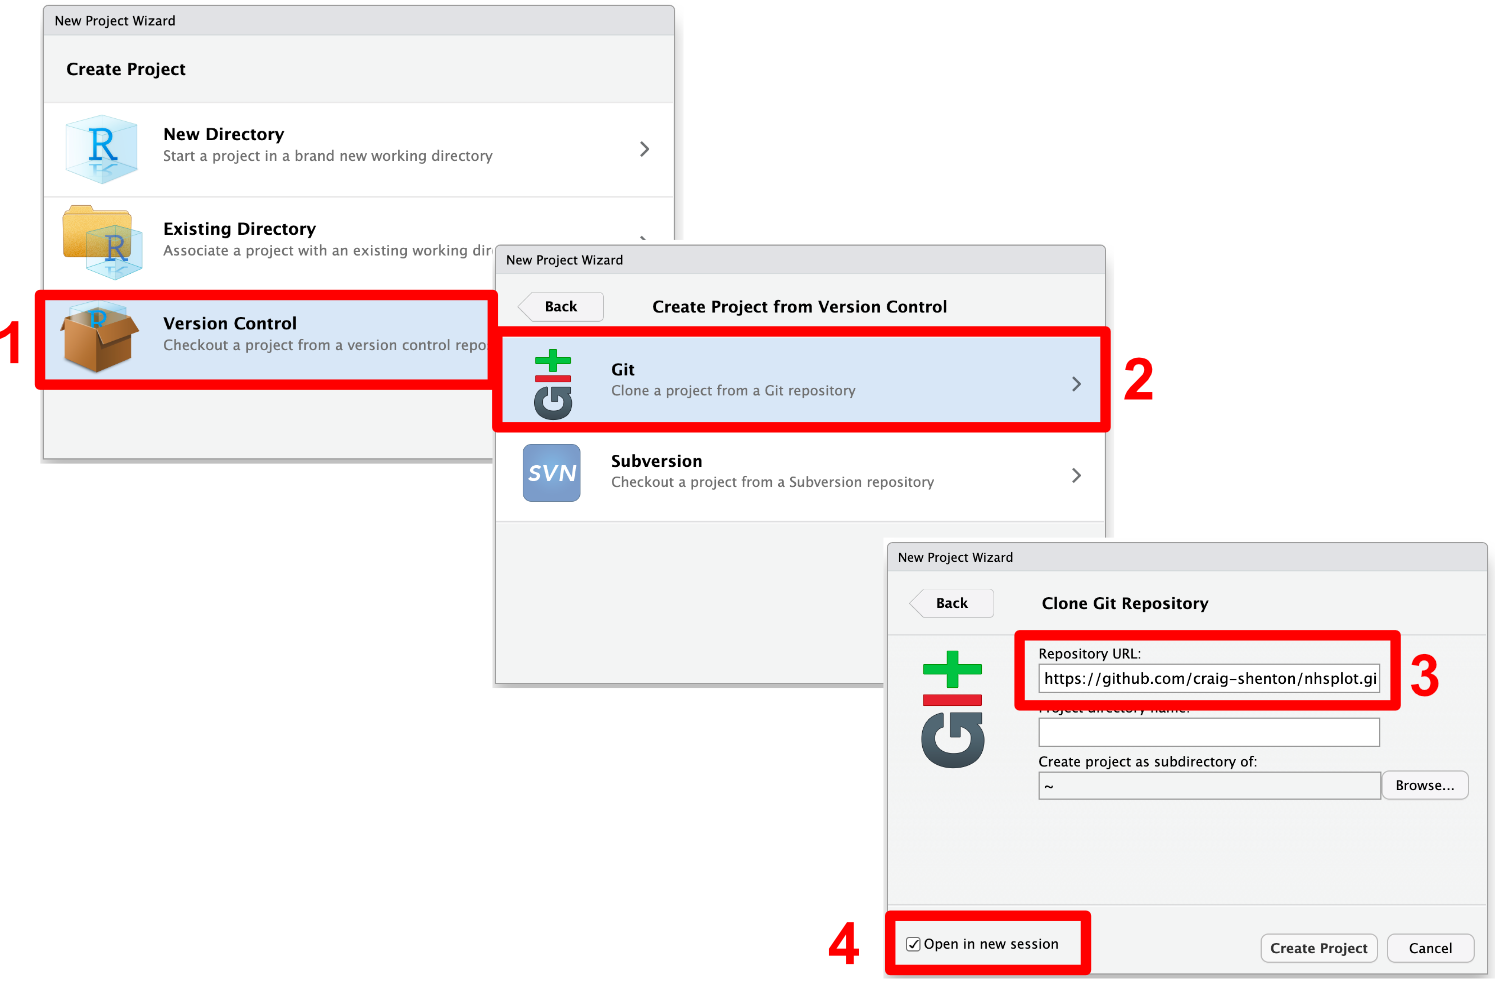
Now in R-Studio, we start by creating a new project:
- Choose the third option
> Version Control. - Then select the
> Gitoption. - Paste the HTTPS address in the Repository URL.
- Remember to tick (Open in new session) option and press Create Project.
This will have created a new folder on you local machine. If you navigate to it, you will see it contains all components of a GitHub Project.
The R-Studio Git Menu
A new Git options menu is now available in R-Studio thanks to version control mode. This is how R-Studio can keep track of our project and files. It is important to remember that Git and GitHub keep track of changes on files , not folders.
Once we start adding content to your project in R-Studio the changes will show up here.

- To select files to be saved to a Git commit, click the
Stagedoption on Git tab - To make a commit locally from R Studio we press the
Commitbutton. Make sure to name your commits in a descriptive way. - To sync your local commits to GitHub (online), we then press
Push.
It will now ask us for our GitHub username and password.
You will get this error message: Support for password authentication was removed on August 13, 2021. Please use a personal access token instead.
Therefore, we can’t use our GitHub password, but instead a personal access token. This is a security feature for using HTTPS to connect your repo to R-Studio.
Generate an GitHub Access Token
This is required to authenticate users from R-Studio with their specific GitHub repo, so code we push from R studio can be securely identified with the developer’s project repository:
- Log into GitHub, navigate to your profile icon, top righ and click on
> Settings. - At the bottom of the next menu, click on
> Developer settings. - Select
> Personal access tokensand then the> Tokens (classic). - Finally, click
> Generate new token (classic)from the top right button.

- Give your token a name (“R-studio git” for example).
- Set expiration date for 90 days.
- Set the scope to cover
repoand its sub-sections. - Unless specifically required, do not grant access to other sections.
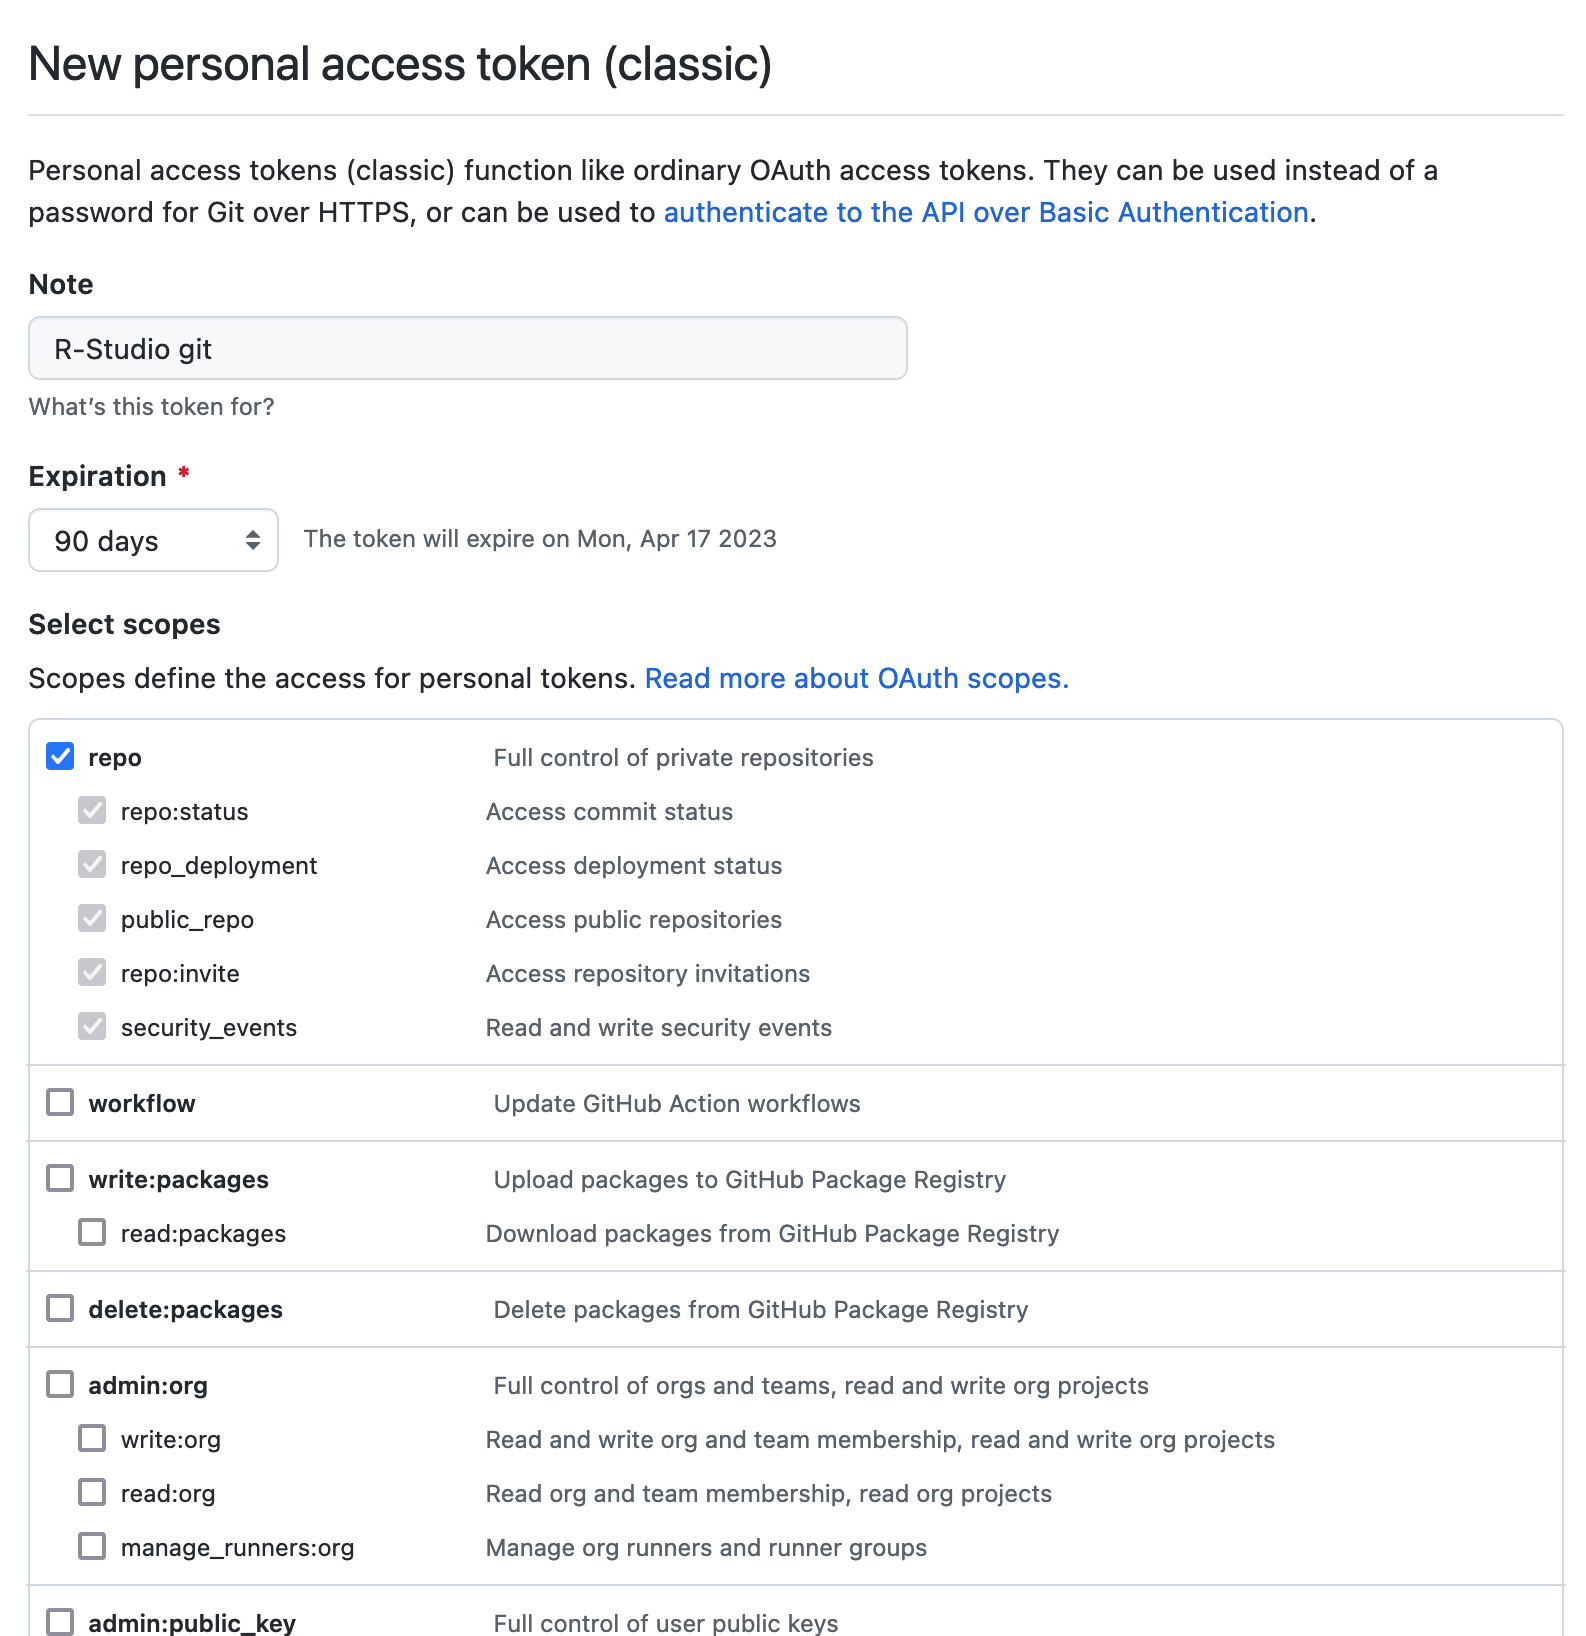
- Click on
> Generate tokenbutton at the bottom of the page.
Make sure to copy your personal access token now. You won’t be able to see it again!
Never share your token with anybody. That will allow other users to control any action in scope on your GitHub account.
You can now, paste the token into R-Studio in lieu of a password.
Published to GitHub
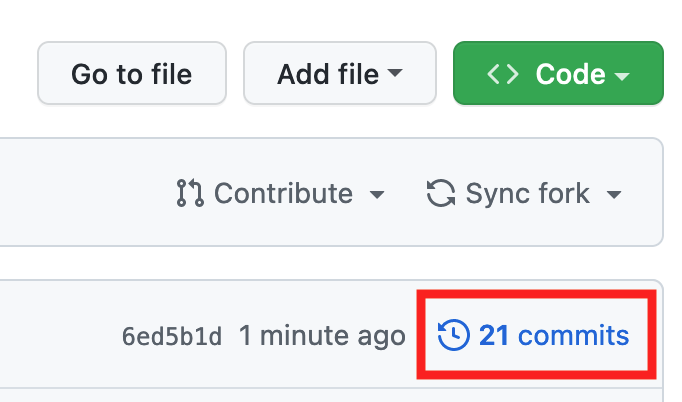
After all these steps, we have finally uploaded our modified file from R-Studio to GitHub. You can check that the file is available now on GitHub by looking at your commit history:
Resources
Tutorial for Creating a new RStudio project with GitHub to visualize climate change. Riffamonas Project YouTube channel. https://www.youtube.com/watch?v=d5dUkO5lXds